How to Grow Blackcurrants with Cuttings
In spring, it's easy to take cuttings to grow blackcurrants. If you don't have your own bush, ask a friend for a few twigs. Keep reading to learn how it's done!
All my blackcurrant bushes originate from cuttings I've taken since 2011. It's surprisingly easy to grow blackcurrants from cuttings!
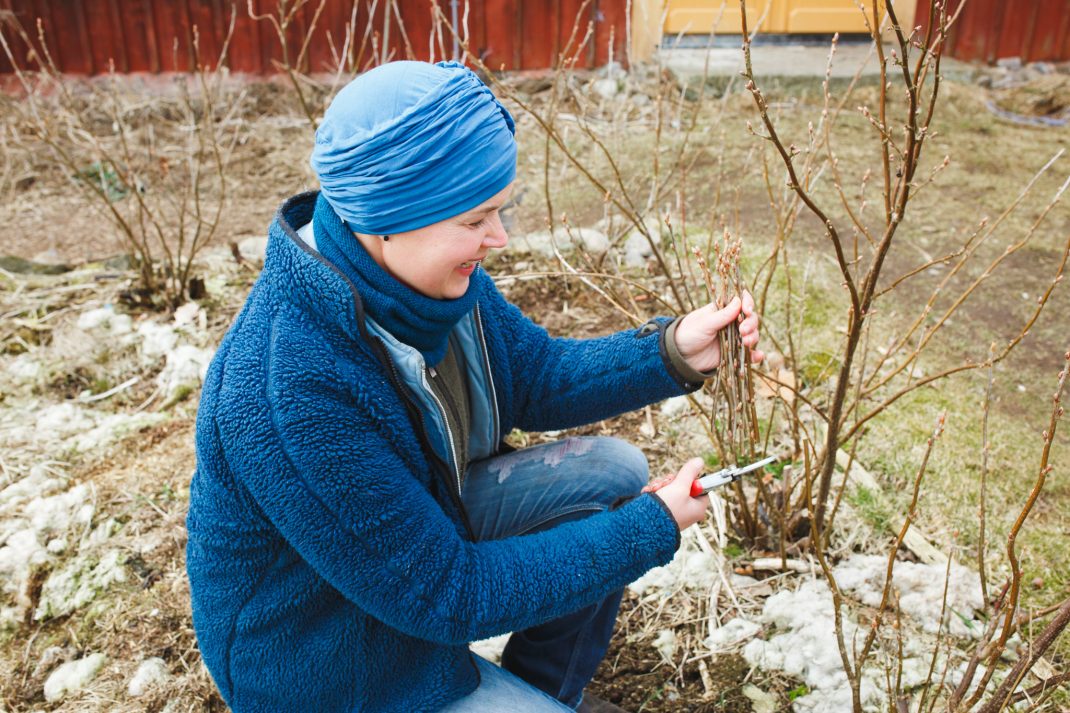
My blackcurrant bushes are starting to wake up after their winter rest. They're bursting with buds and new shoots eager to finally meet spring. It's so amazing to see! I propagated all my blackcurrants from cuttings I got from my neighbors who live just down the road. I have no idea about the specific variety, but since they've thrived here in our village for so long, it felt right to grow blackcurrants in my garden too.
However, I've decided to relocate some of my blackcurrant bushes, even though I haven't figured out their new spots yet. I need to clear the area for other purposes and have chosen to gift the bushes to friends. To make sure I have plenty of plants when needed, I'm taking cuttings before digging up and rehoming the original bushes.
It's perfectly fine to take blackcurrant cuttings from winter until after harvest. Keep reading to learn how to grow blackcurrants from cuttings!
Read more: Propagating figs with cuttings
A long cutting can become a lovely blackcurrant bush within a few years.
The cuttings actually smell lovely!
Grow blackcurrants in spring
Taking cuttings is a lovely task in spring. The plants are full of energy, and new shoots root quickly. It's incredibly simple!
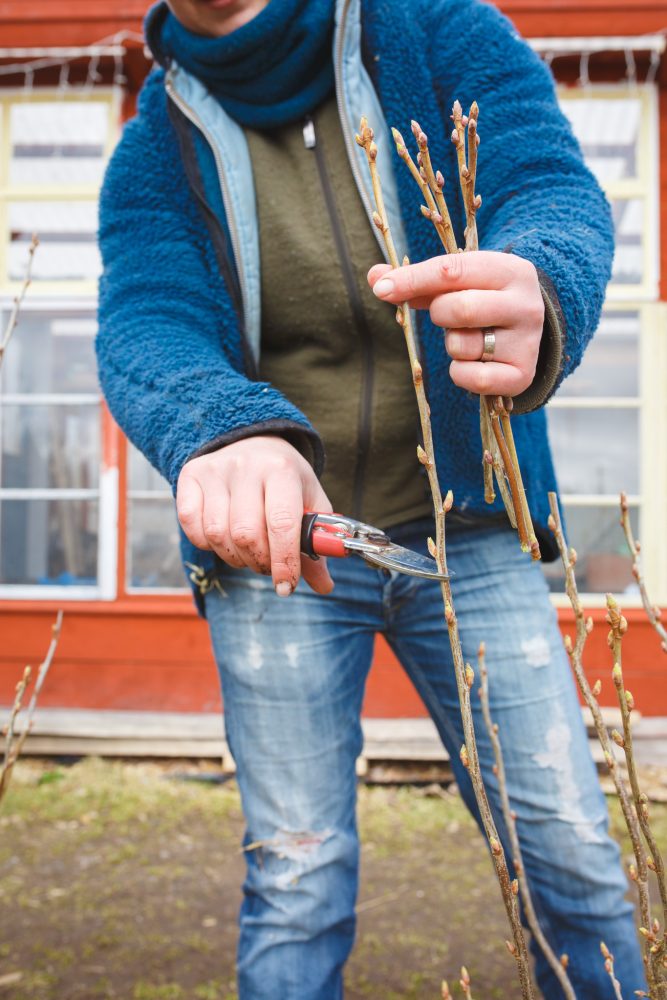
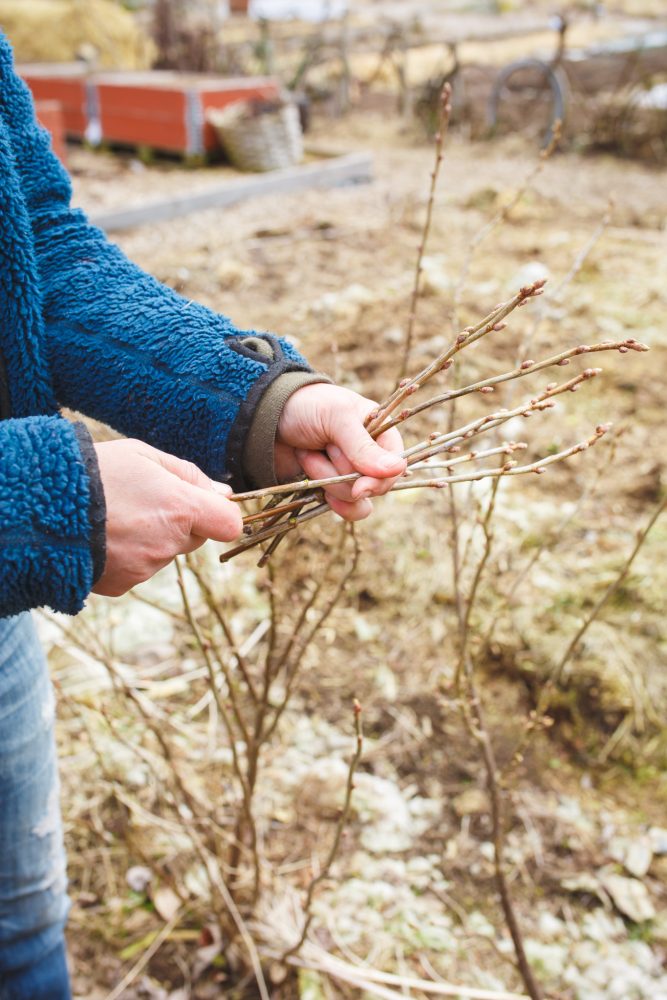
I snip off some of the thinner twigs from the top of the plant, avoiding the woody, hardened parts. It's okay if there are buds or small leaves growing on them. The twig can be around 4-8 inches (10-30 cm) long, depending on how you plan to use it later.
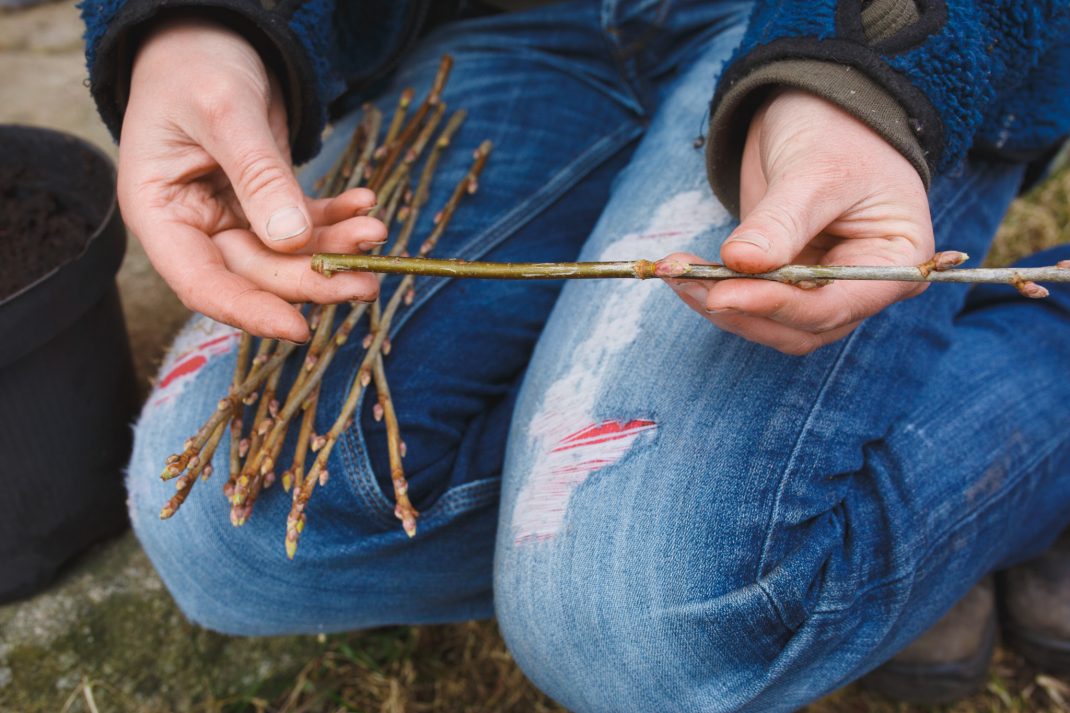
Remove any leaves or buds from the lower part of the cutting and place it along the edge of a large pot filled with soil. You can use garden soil, compost, or potting soil from the store. I would recommend using plastic pots, since it's important to keep the soil moist while the cuttings root. Clay pots tend to dry out more easily.
Read more: How to grow blueberries at home
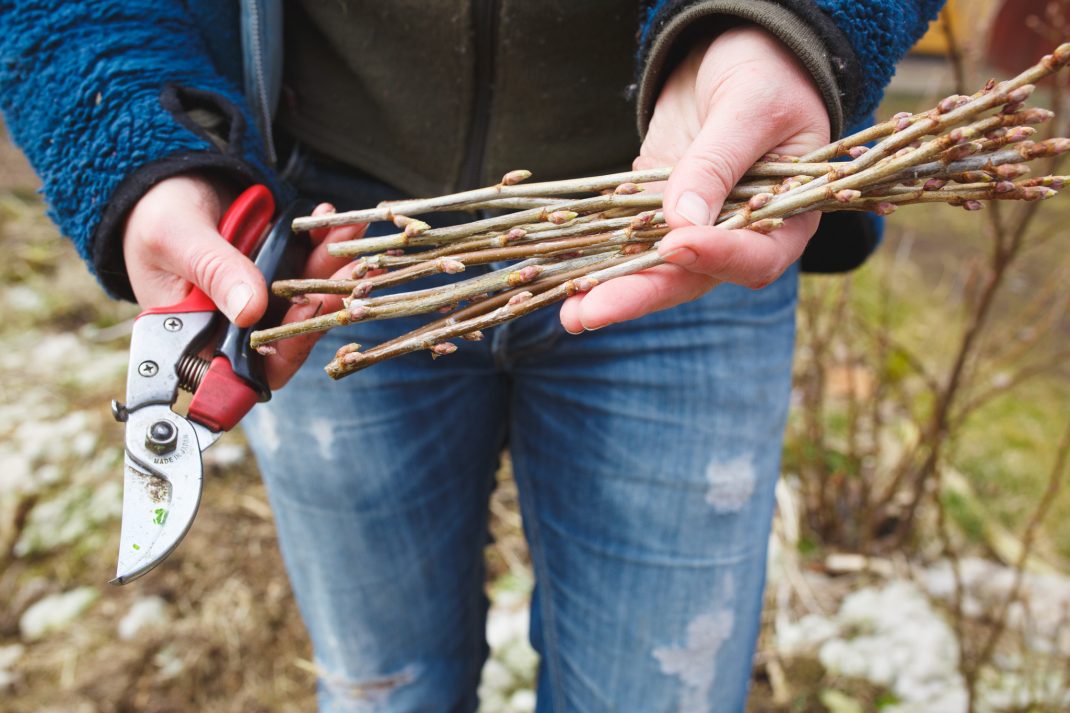
Roots form along the part of the twig that is buried in the soil. I remove buds and small leaves from the lower section.
It takes several weeks, perhaps as long as two months, for the cuttings to develop roots. During this time, I usually keep the pot in a shaded spot to prevent it from drying out. Eventually, you'll notice the cuttings "holding on" differently than before. Additionally, roots may become visible through the drainage holes at the bottom of the pot.
At that point, it's time to move the cuttings to the next stage.
Read more: Growing pink currants
Plant in a pot
I find it best to pot the rooted cuttings individually rather than planting them directly in the ground or their final location. They're still a bit fragile when newly rooted. If planted directly in the soil, it's harder to remember to care for them, and they're exposed to various risks like pets, children, or lawnmowers. So, place them in individual pots, preferably in a semi-shaded area where they won't dry out. This is in my opinion the safest way to grow blackcurrants from cuttings.
Blackcurrants are easy to propagate from cuttings. The cuttings are usually straight and simple to work with. This is a great and simple way to grow blackcurrants at home.

Here, all the cuttings are placed along the edge of a regular plastic pot.
You can also propagate:
The cuttings are quite sturdy and unlikely to break during handling.
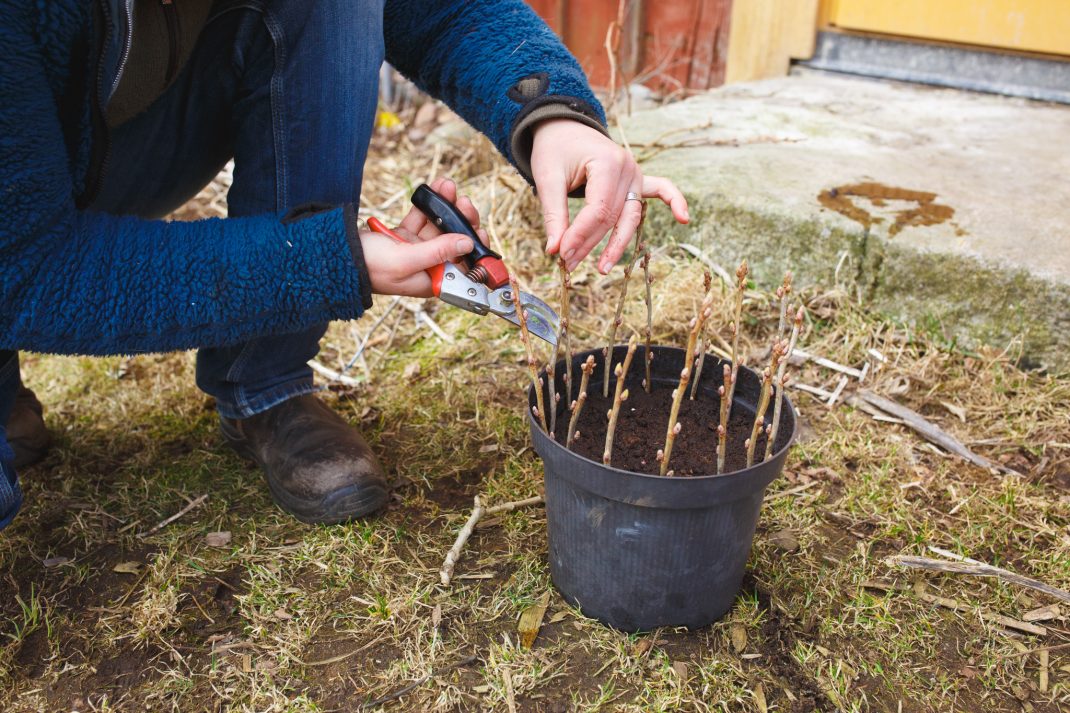
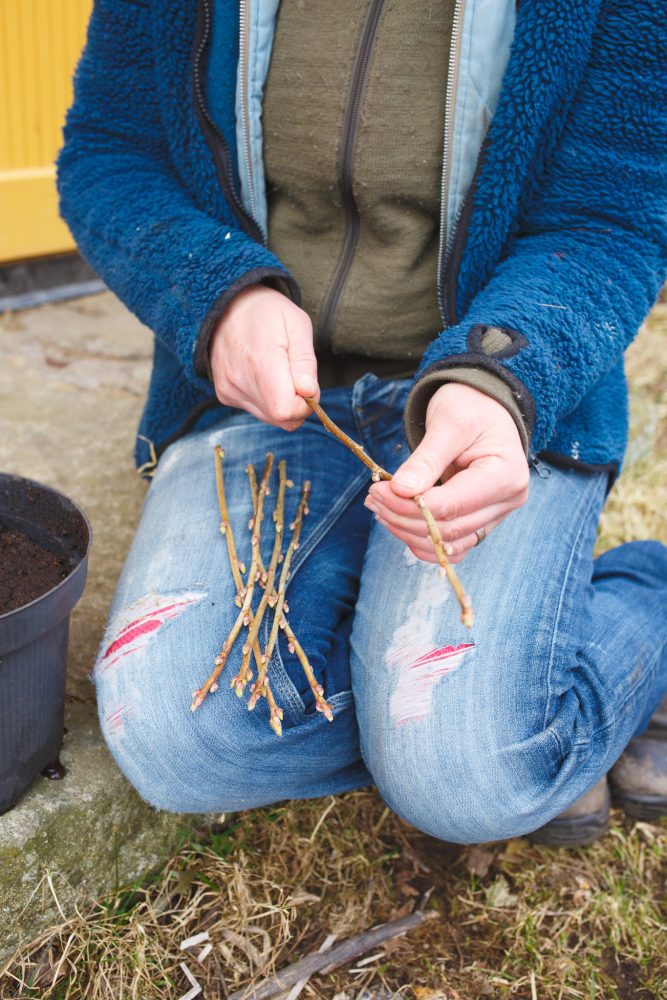
I trim half of the cuttings to remove the top, allowing them to branch out, while the longer cuttings are left to grow straight up.
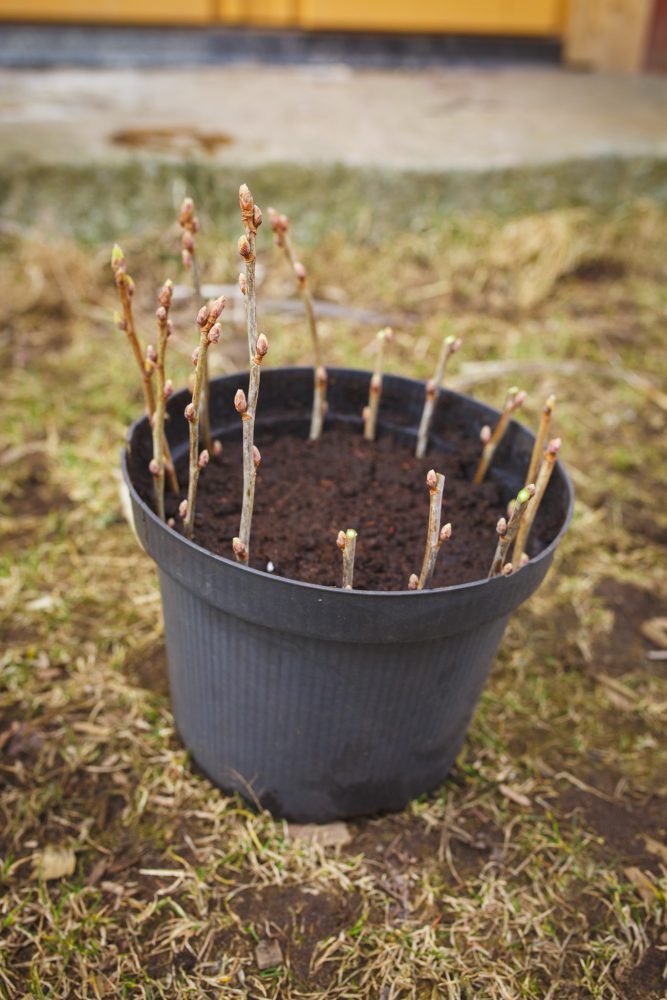
Fourteen beautiful cuttings for new bushes. Nearly all of them usually take root.
Choose the shape
When taking cuttings to grow blackcurrants, you can actually decide what shape your plant will take. It's exciting! I have lovely plants in progress that are being trained into standard (tree-like) forms, where I shape them with a tall stem and a crown that forms at the top. You can also choose to create a classic bush or train the plant into a fan shape that works well for an espalier.
When you've taken the cuttings, you can pinch off the top of some of them. These will develop side branches or shoots where the buds are located. Other cuttings can be left unpinched, and you can remove buds or small growths along the cutting — except at the top. This way, it will grow taller. Once it reaches your desired height, pinch off the top, and the plant will then branch out.
More: Follow me on YouTube here
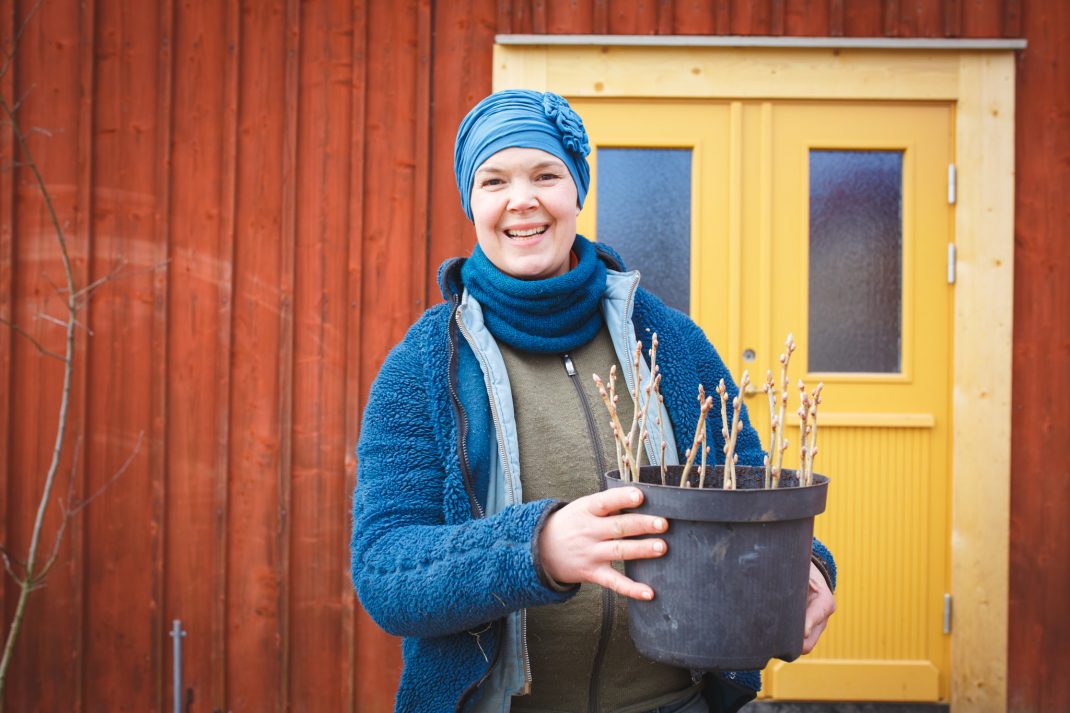
Happy and excited with so many cuttings in progress! It takes about 4 years for a plant to grow large enough to produce a proper harvest.
When taking cuttings to grow blackcurrants, you might as well take many! Why not give some of them away? I can guarantee that someone will always appreciate them.
Remember, many other berry bushes can be propagated with cuttings in the same way. The only one I'd advise against is blueberries, as they have very specific requirements. I hope you try to grow blackcurrants with cuttings too!
/Sara Bäckmo
21. March 2025


Leave a Reply
You must be logged in to post a comment.